You are here: Home > Products > Network Monitor (Pro) > User Manual > Using Geomap as Background for Network Monitoring
Using Geomap as Background for Network Host Monitoring - Open Street Map
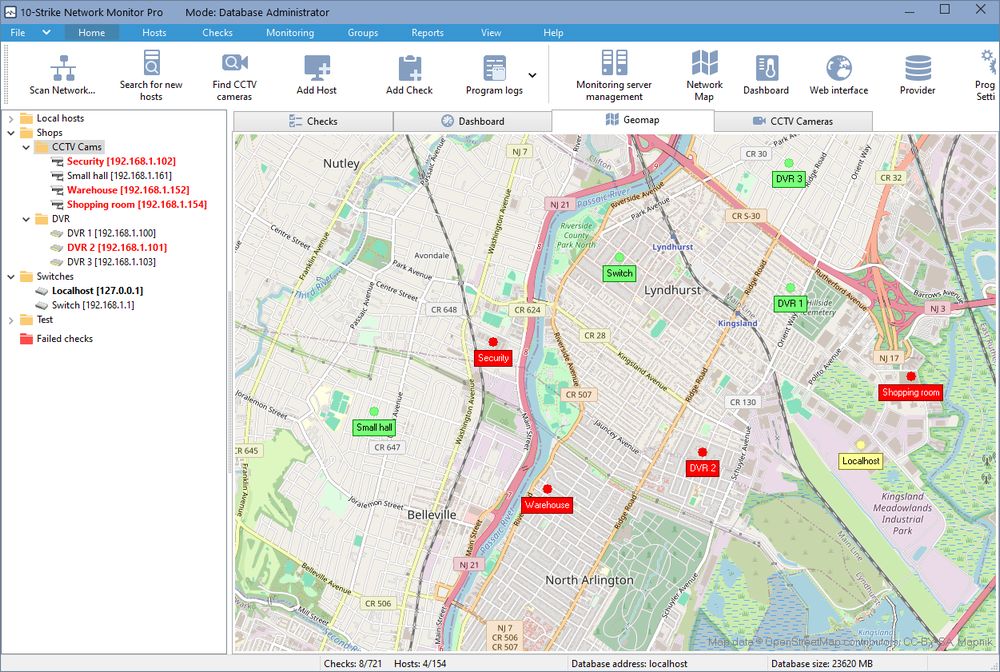
Hosts in the monitoring database can be displayed on an interactive map Open Street Map with reference to specific addresses and coordinates (locations and buildings).
There are several ways to place hosts on a geomap:
- Open the Geomap tab, drag one or more selected hosts from the host tree onto the map with your mouse. Drag the labels that appear to the desired addresses. Changes are saved automatically.
- Create a text list of hosts in the format:
DNS;IP;MAC;Name;Comment;Address;;
example: ALEX;192.168.1.1;00-11-22-33-44-55-66;My computer;Work computer; Antonína Cermáka 2a Prague;;
or
DNS;IP;MAC;Name;Comment;;Latitude;Longitude
example:
SERVER;192.168.1.2;01-12-23-34-44-55-66;Server;Server room #21;;33.63738;67.345435
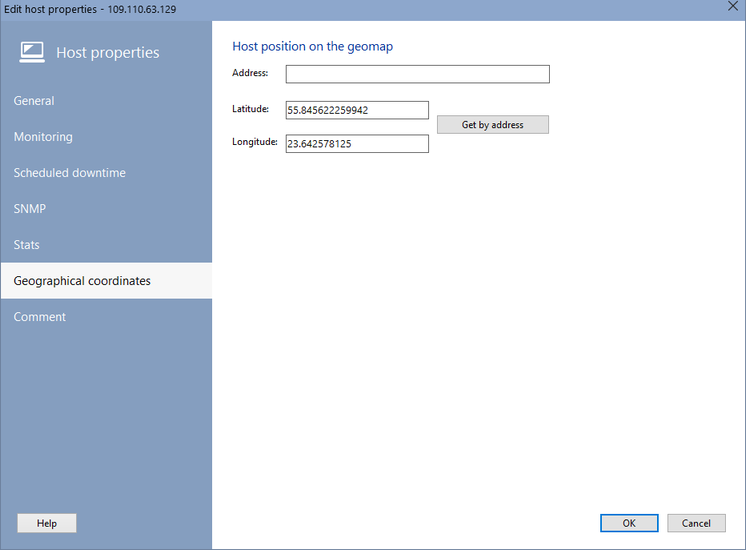
Import hosts into the program from the main menu: Hosts | Add hosts from file. When you open the Geomap tab, the added hosts will be displayed with reference to the specified addresses or coordinates. - Open the Change Host dialog. Go to the Geographical coordinates tab. Enter the address or coordinates in the xx.xxxxxx format. Save the changes and update the map (use the map context menu, the Update item).

- Call the map context menu (using the right mouse button), select Place host. Select one or more hosts from the list. Click OK. Move the captions to the desired addresses.
When you click on a host’s caption on the map, its parameters and check status are displayed.
Using the caption's context menu you can:
- Remove the tag from the map. The host itself remains in the monitoring database, only the coordinates and address parameters are deleted
- Open the CCTV camera video stream for viewing if the host has an active RTSP check set up
- Go to the list of checks for this host
Using the map context menu you can:
- Quickly go to the desired address on the map
- Update the map
- Add hosts to the map
Host labels have a color that corresponds to the status of the host:
- green - all checks have passed
- red - all checks have failed
- yellow - at least one of several checks has failed
In the program settings, in the View section, you can select a map server for this widget.
The following map providers are available now:
- OSM
- ArcGisWorldStreetMap
- Aqicn
- OpenRailWayMap
